

-
 SUAPP AIR
-
 Release Notes
- /26
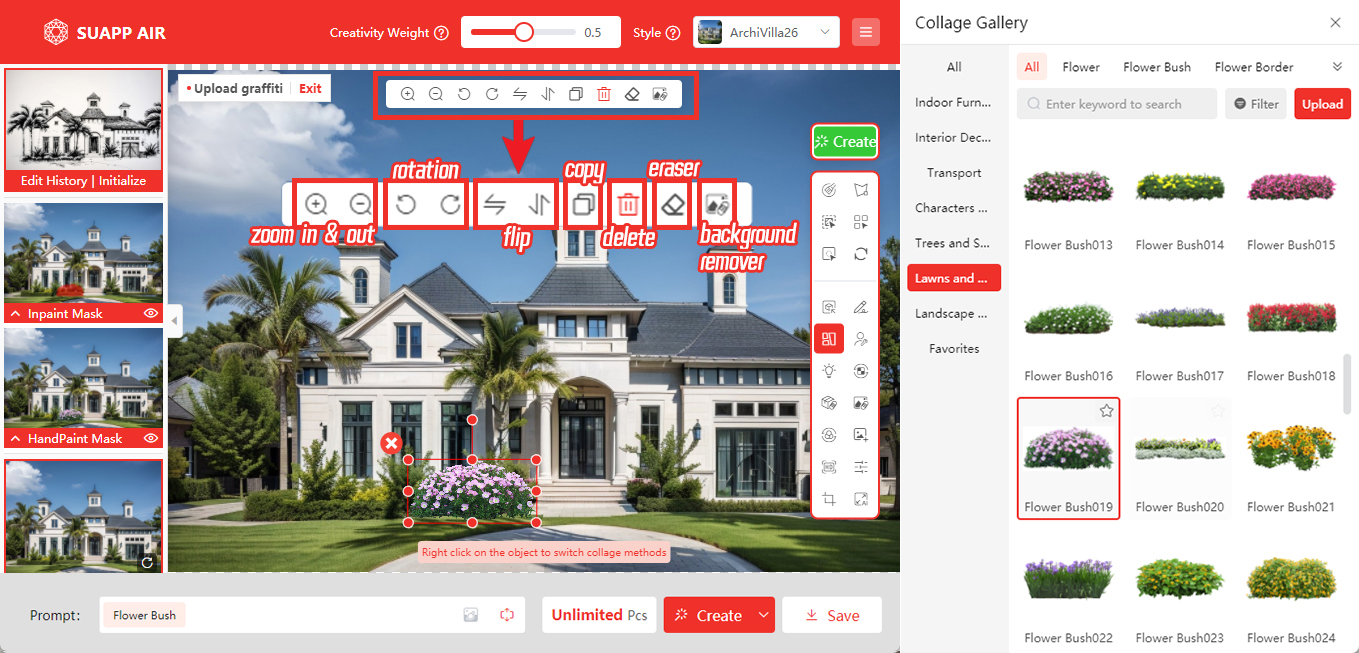
 Collage
Quickly import transparent PNG assets such as furniture, decorations, people, or background elements. Adjust their size, position, and angle, then place them into the scene. You can also apply partial rendering to the inserted area as needed.
Collage
Quickly import transparent PNG assets such as furniture, decorations, people, or background elements. Adjust their size, position, and angle, then place them into the scene. You can also apply partial rendering to the inserted area as needed.
Demo Video: SUAPP AIR | 21 Photo Collage
- /53
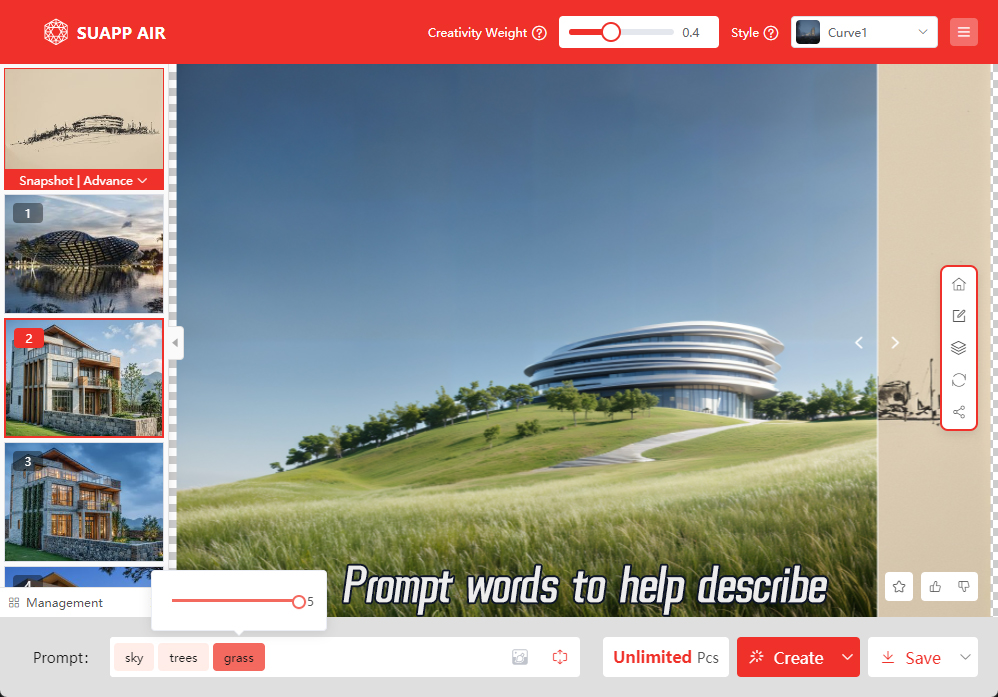
Prompt Words
Use clear, descriptive keywords to guide your render results. You can adjust the weight of each keyword to highlight specific elements. The Lingxi style responds especially well to detailed prompts, offering more accurate outputs.
Prompt Tips
Be specific—for example, use “river,” “lake,” or “ocean” instead of “water”; or “asphalt road,” “stone path,” instead of “road.” Fine-tuning keyword weights helps control what stands out in the final image.
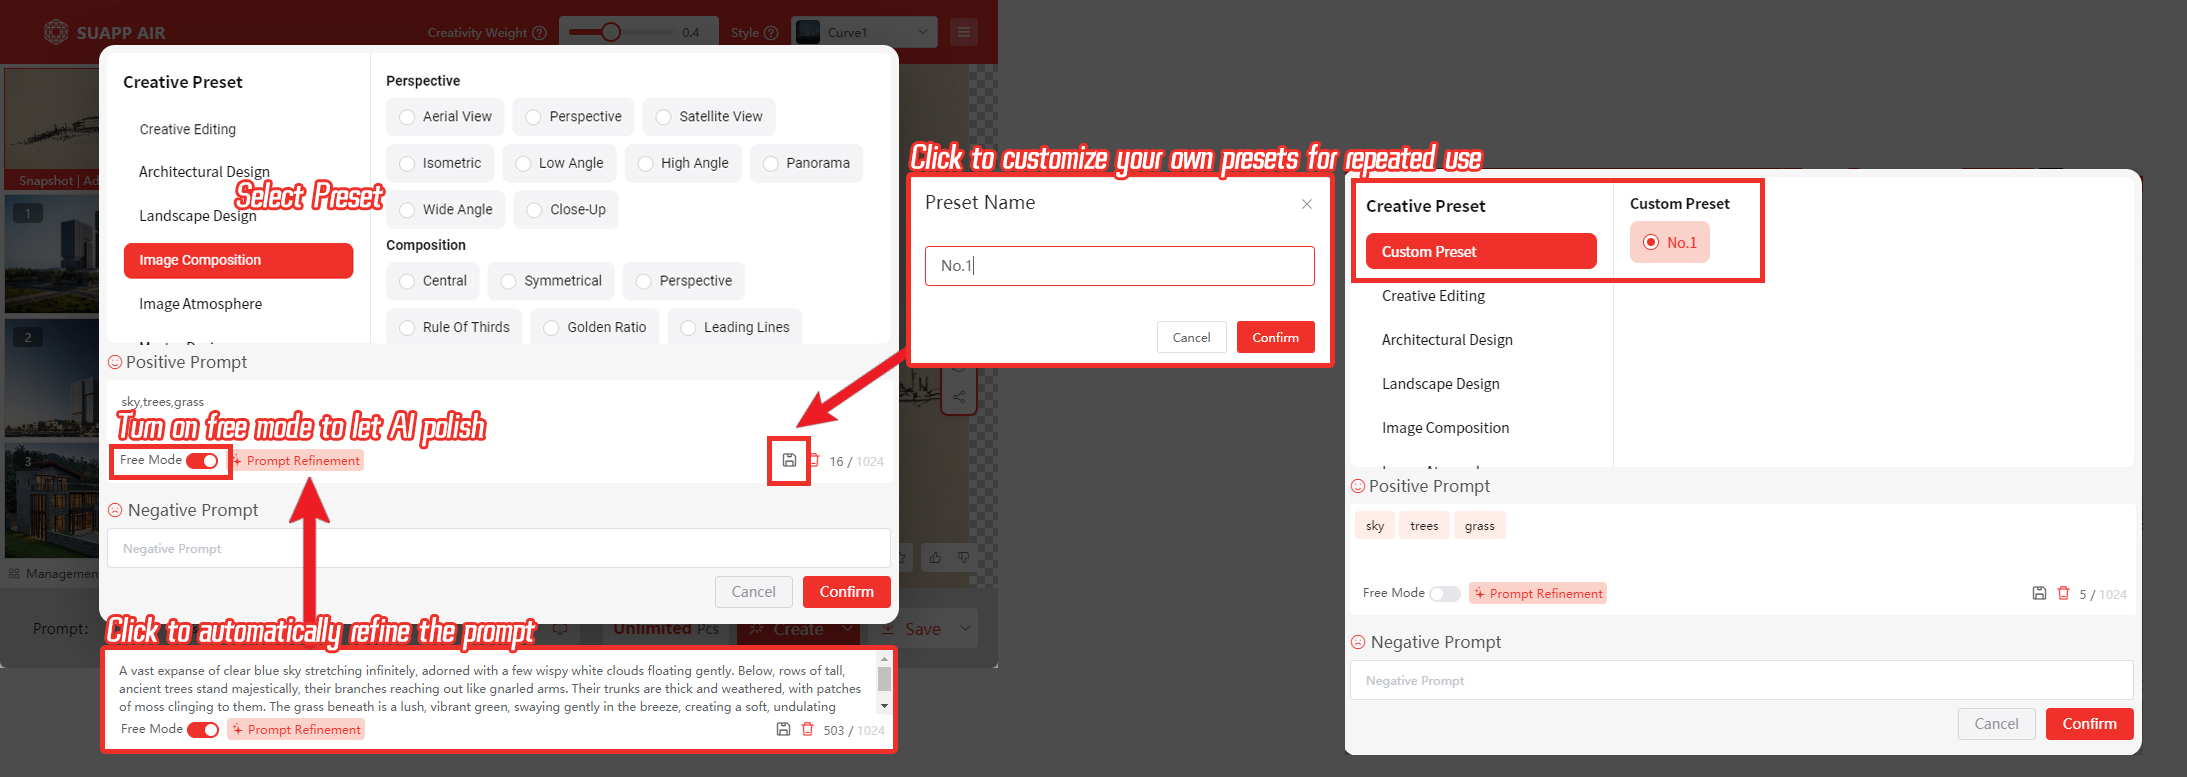
Creative Preset
Not sure how to write prompts? Start with a preset. You can also customize your own presets for repeated use. Even simple descriptions can be enhanced using Free Mode and Prompt Refinement, helping you craft richer and more accurate inputs.
Demo Video: SUAPP AIR | 07 Weights and Prompt Words
- /90
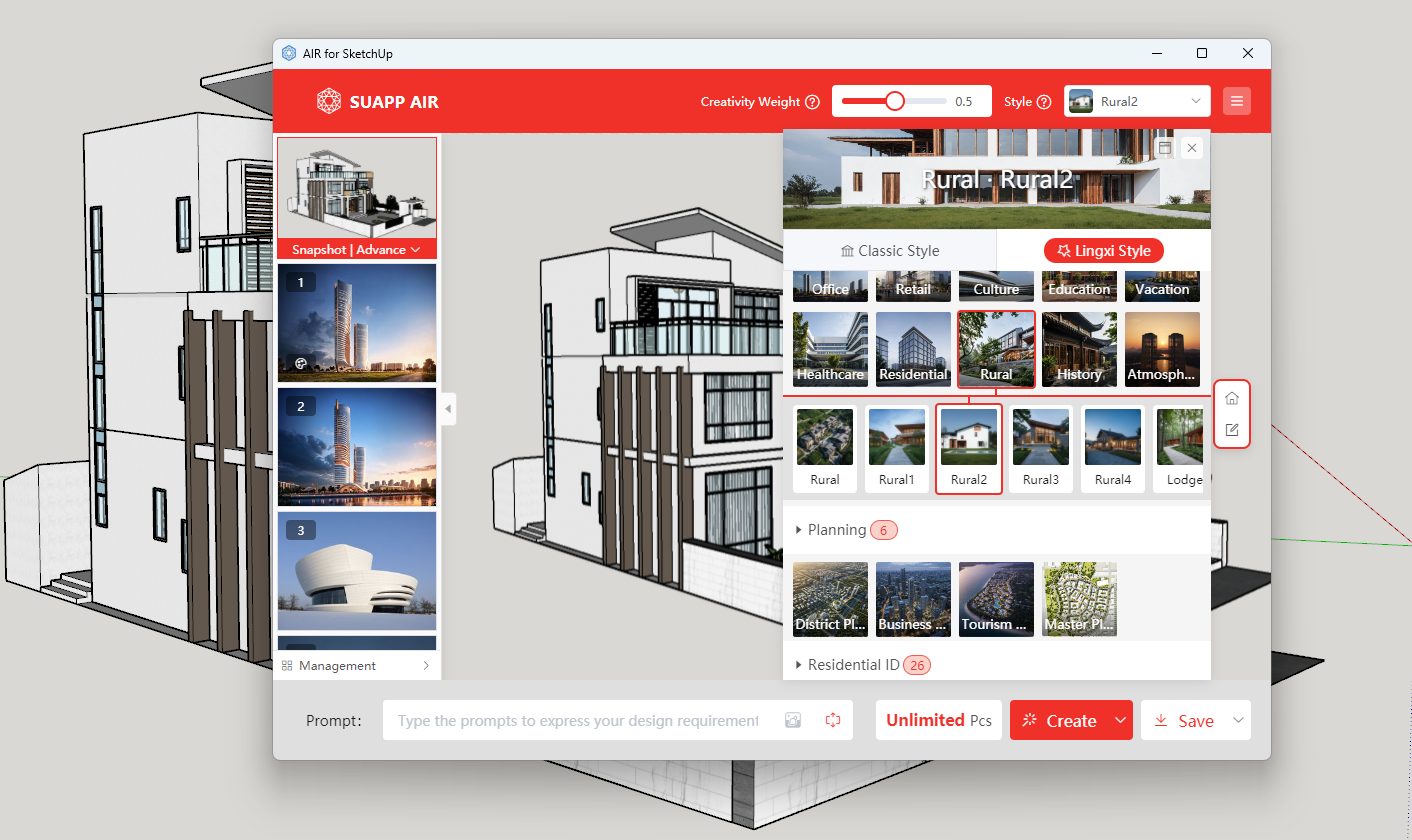
Select a Rendering Style
In the top-right corner, choose a style from the “Style” menu.
Currently, SUAPP AIR offers 2 modes, 12 major rendering categories and over 600 unique styles to explore.
- /18
How does SUAPP AIR generate images?
SUAPP AIR uses AI to turn your image into linework, then references a large design dataset to interpret and generate visuals that help explore your ideas.
- /29
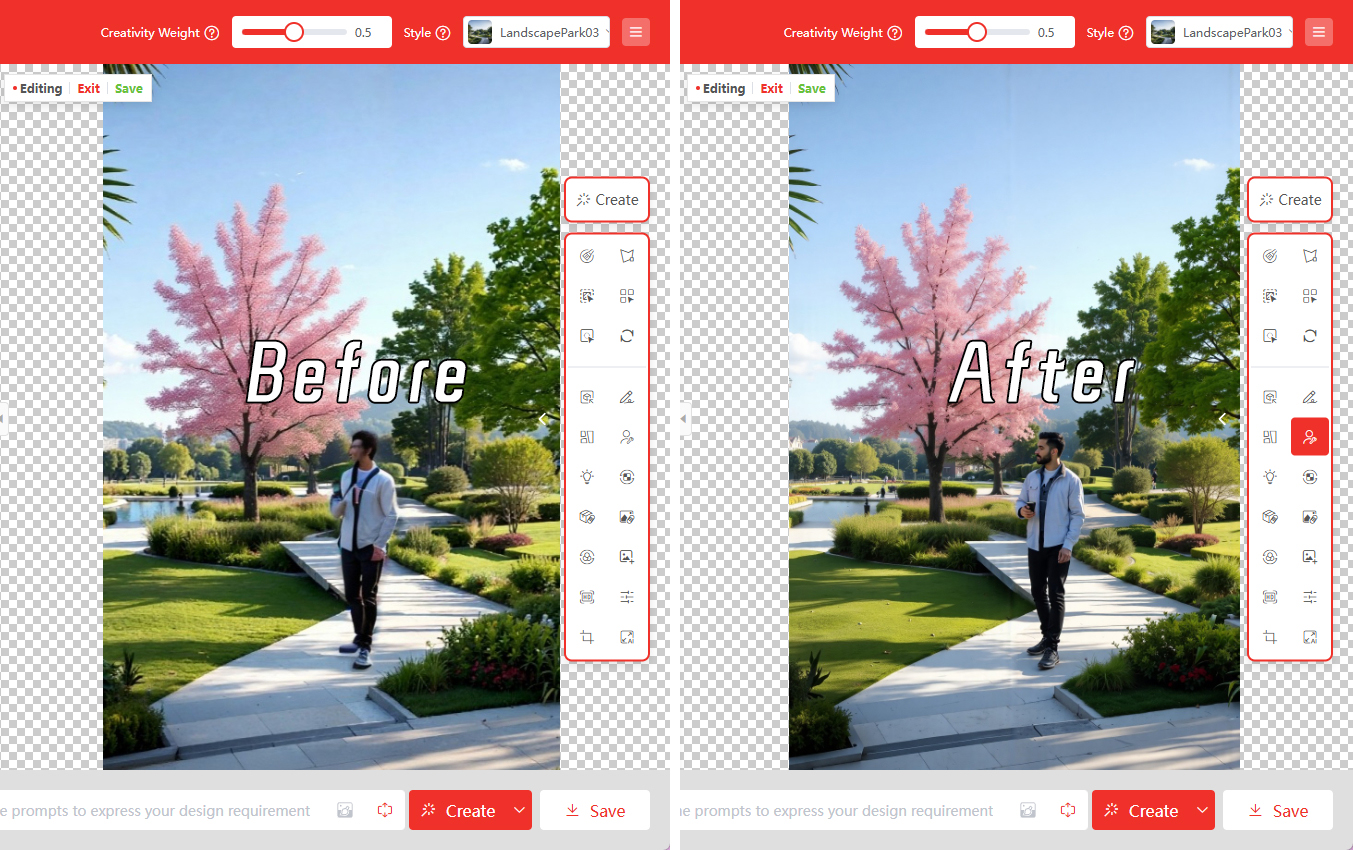
Person Fixer
Automatically detects and enhances background characters in the image with one click, enhancing clarity and realism. Perfect for refining AI-generated figures that appear distorted or unrealistic.
- /39
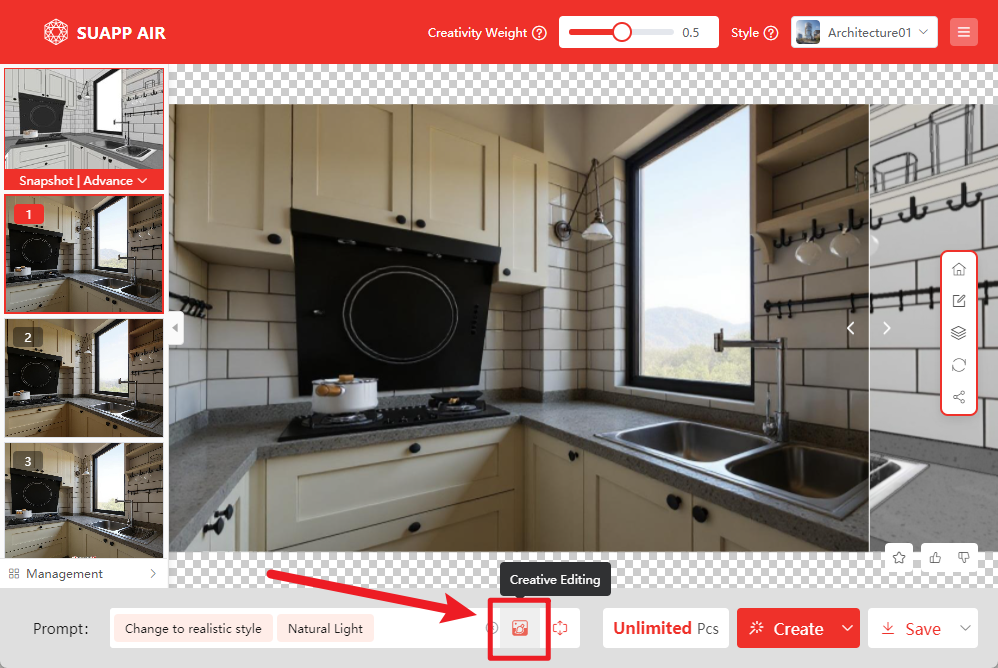
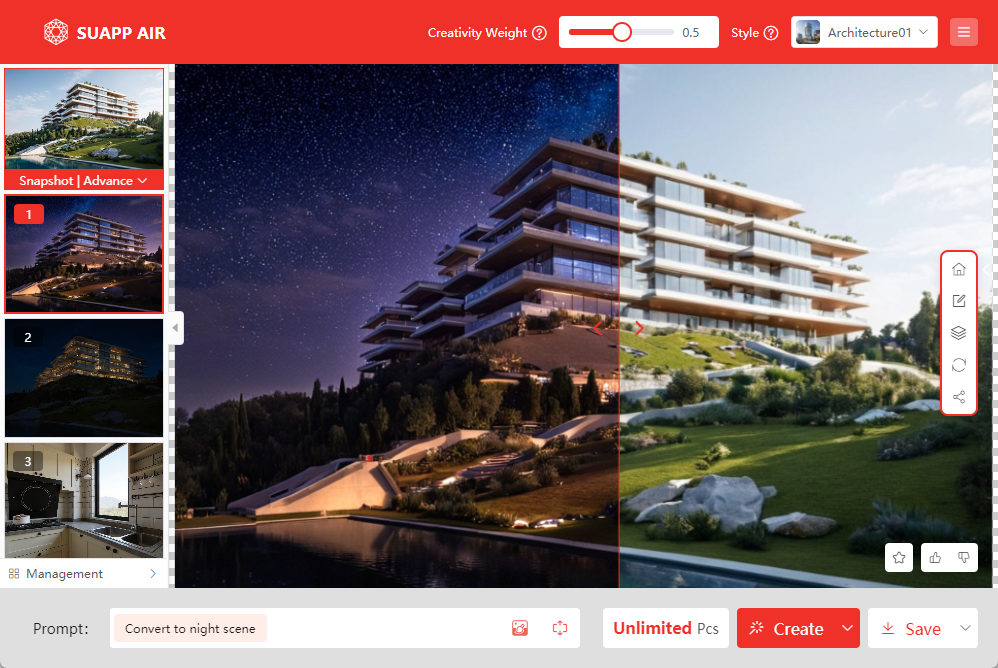
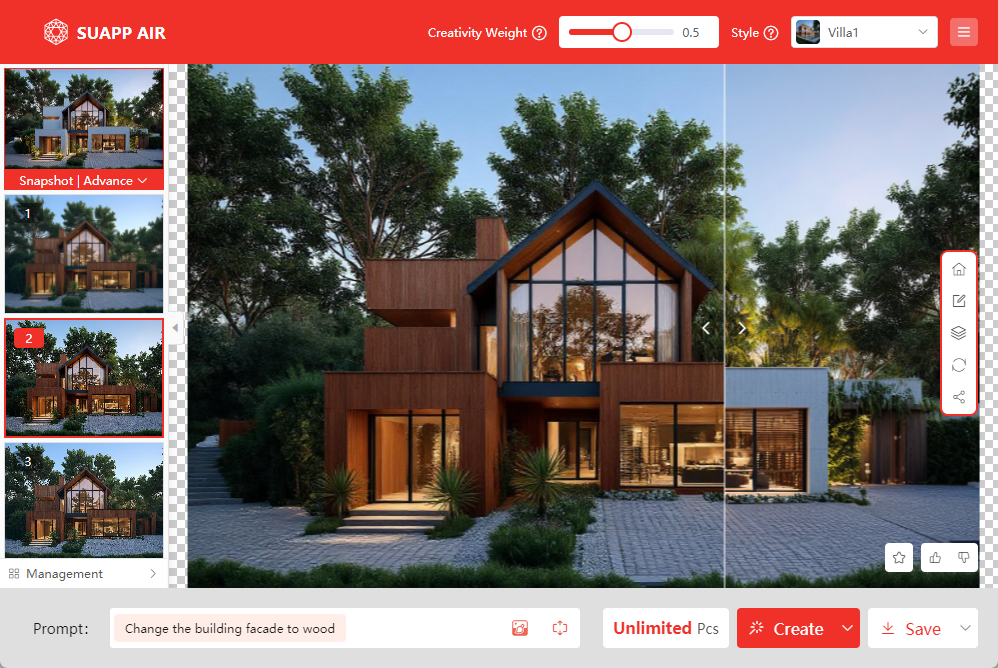
Creative Editing
Use prompt words to precisely modify images. Adjust styles, viewpoints, switch day/night, change seasons, add or remove objects, alter local materials, and more—a versatile tool that also supports masked local edits.
1. Creative Presets
Choose a preset to generate images instantly—no need to adjust any settings.
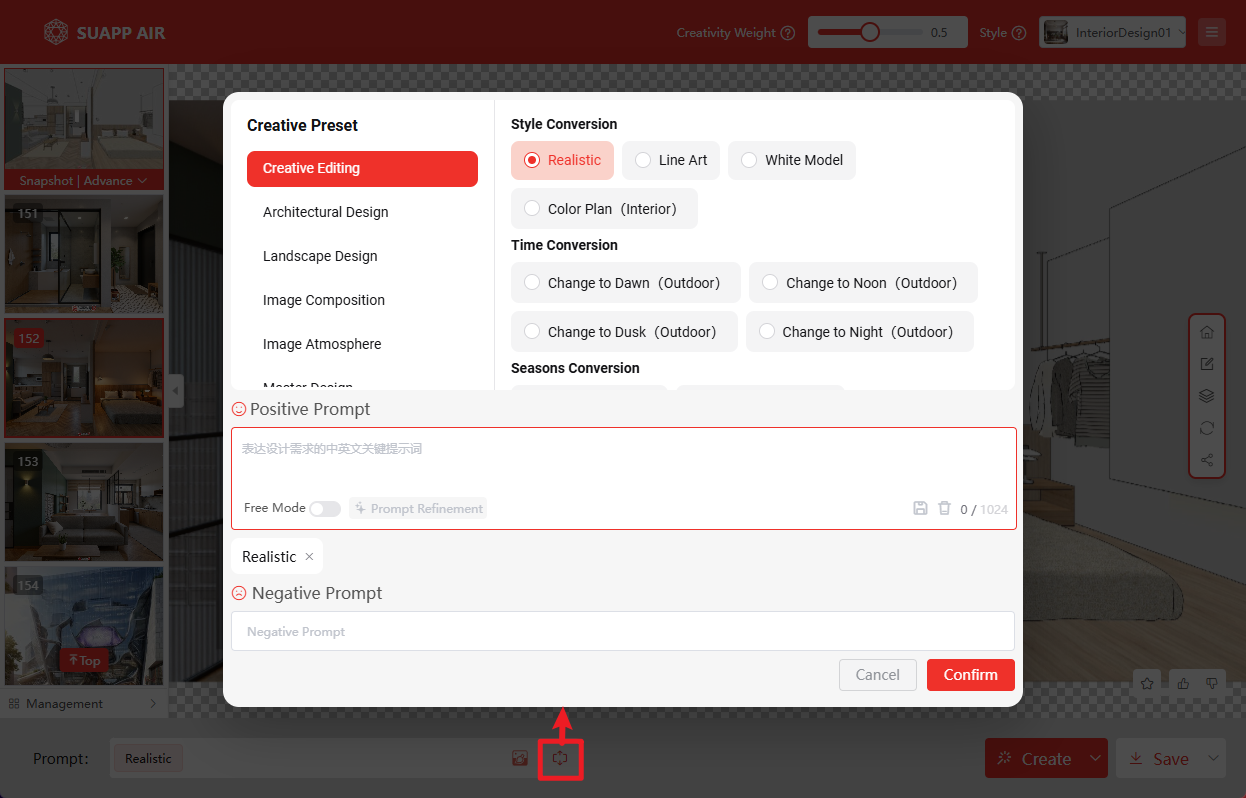
2. Custom Prompt Mode
● When enabled, only prompt words affect the result; other settings are ignored. Clear descriptions are essential.
● You can use masks to limit edits to specific areas for more precise control.
● After generation, use Edit Mode and apply Image Enhancer for better quality.
● If needed, refine further with Iterative Rendering on the right.
- /101
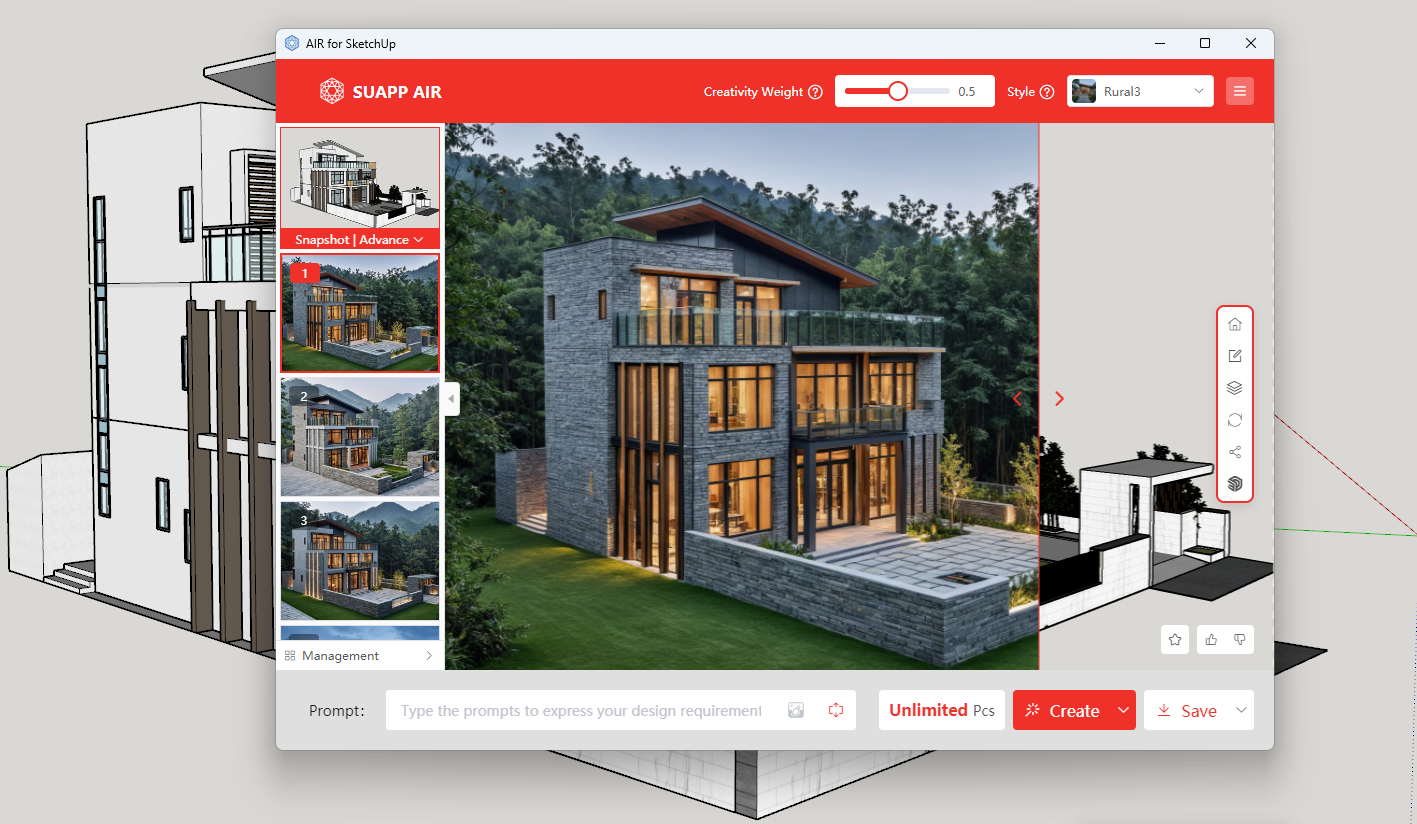
Render Image
Simply click the “Create” button and wait a few seconds—your concept image will be ready in seconds.
Unlike traditional renderers, SUAPP AIR creates results based on the lines in your image and the selected rendering style, delivering a unique, inspiration-focused output.
- /97
How long does it take SUAPP AIR to create a result?
Typically, it takes under 20 seconds for most outputs, with the fastest being 5 seconds. Complex editing or animation generation may take up to 1-2 minutes.
- /19
Space Lighting
Uses AI to intelligently add spatial lighting effects to the image, enhancing the rendering atmosphere and sense of realism.
Demo Video: SUAPP AIR | 30 Space Lighting
- /29
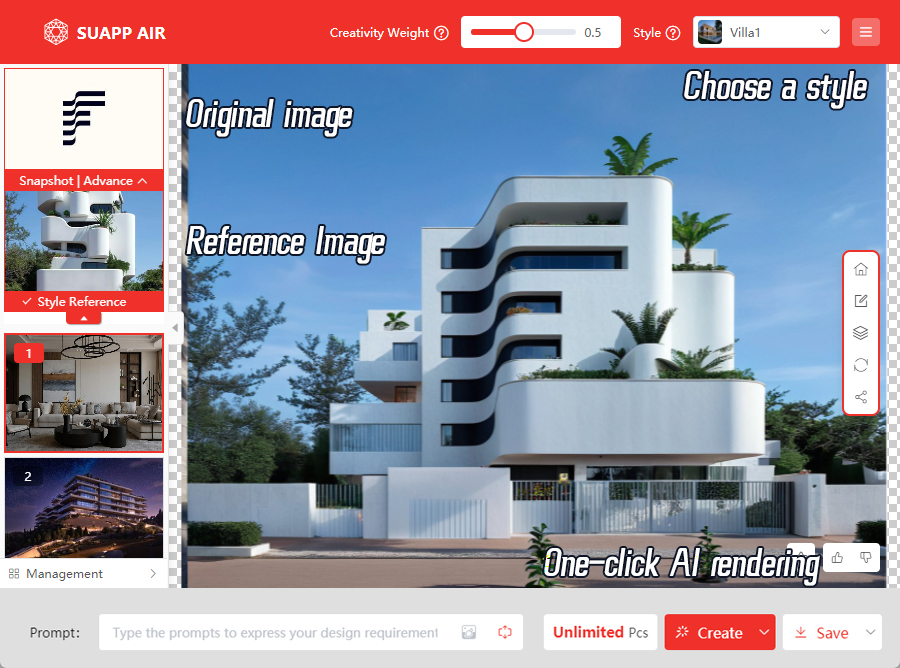
Style Reference
You can add an inspiration reference image below the original input. The rendered result will incorporate the style of this reference image. The style reference here works the same way as the style reference feature in Edit Mode.
Tips:
1. Selecting the Lingxi style will result in a closer match to the reference image.
2. When rendering with a reference image, the influence of the reference image on the final output is greater than that of the chosen render type.
Demo Video: SUAPP AIR | 13 Reference Drawing
- /85
Input Image Technique
1. Use a Proper View Angle
For best results, use standard viewing angles. We recommend human-eye perspectives, such as one-point or two-point perspective, which allow the AI to perform at its best.
In SketchUp, you can adjust the model view by going to Camera > Two-Point Perspective.
Demo Video: SUAPP AIR | 05 Composition Techniques
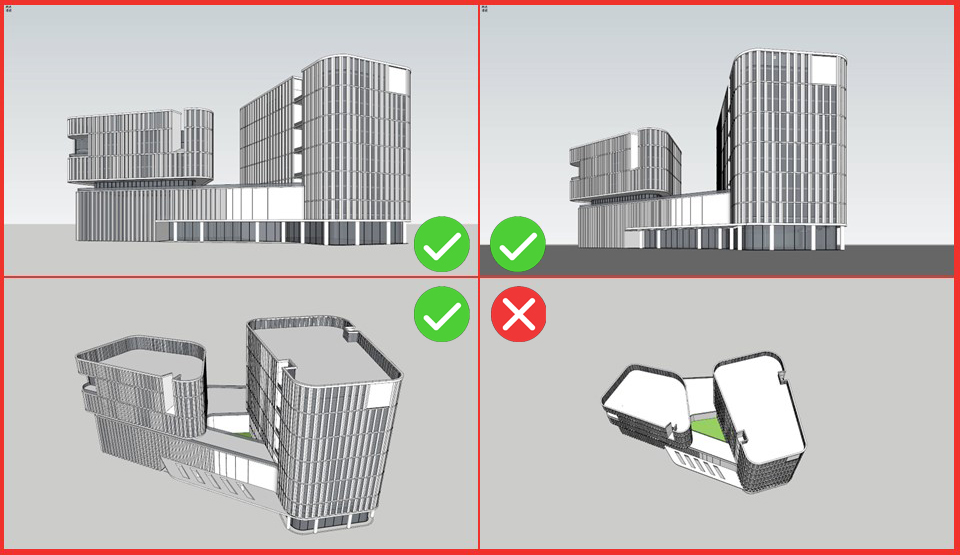
2. Use Proper Composition
Ensure the main subject in your rendering occupies a central and prominent position. Smaller or distant objects may reduce AI recognition accuracy and result in less predictable outcomes. If the composition is poor, use the Crop tool to adjust it.
Tip: Horizontal layouts usually produce better results than vertical ones. After importing, try cropping the image to a horizontal format, ideally around a 9:16 ratio.
3. Remove Distracting Elements
SUAPP AIR recognizes and relies on the linework in your input image. Any unrelated elements such as text, annotations, or extra guide lines may interfere with the rendering process. For optimal results, please remove these distracting elements before rendering.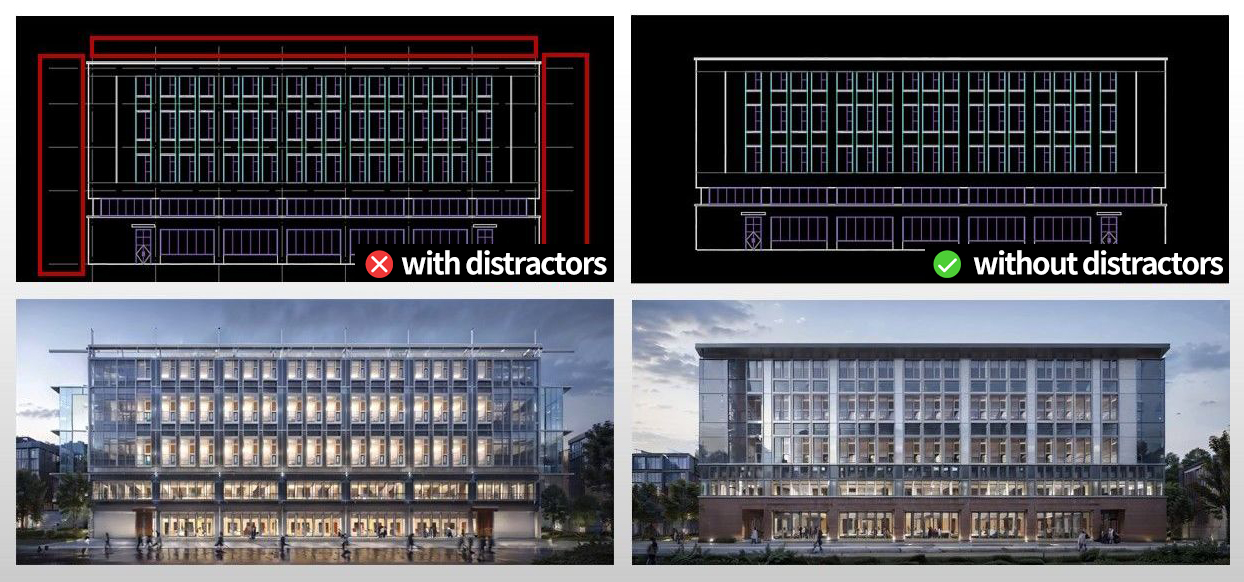
- /156
Is there a limit on the number of images SUAPP AIR can generate?
MAX plan users enjoy unlimited image generation during their membership. Other plans use a credit system—each render consumes credits, and extra credits must be purchased once they run out.
Note: Unused credits expire with the membership. To access them again, you must renew your subscription.
- /29
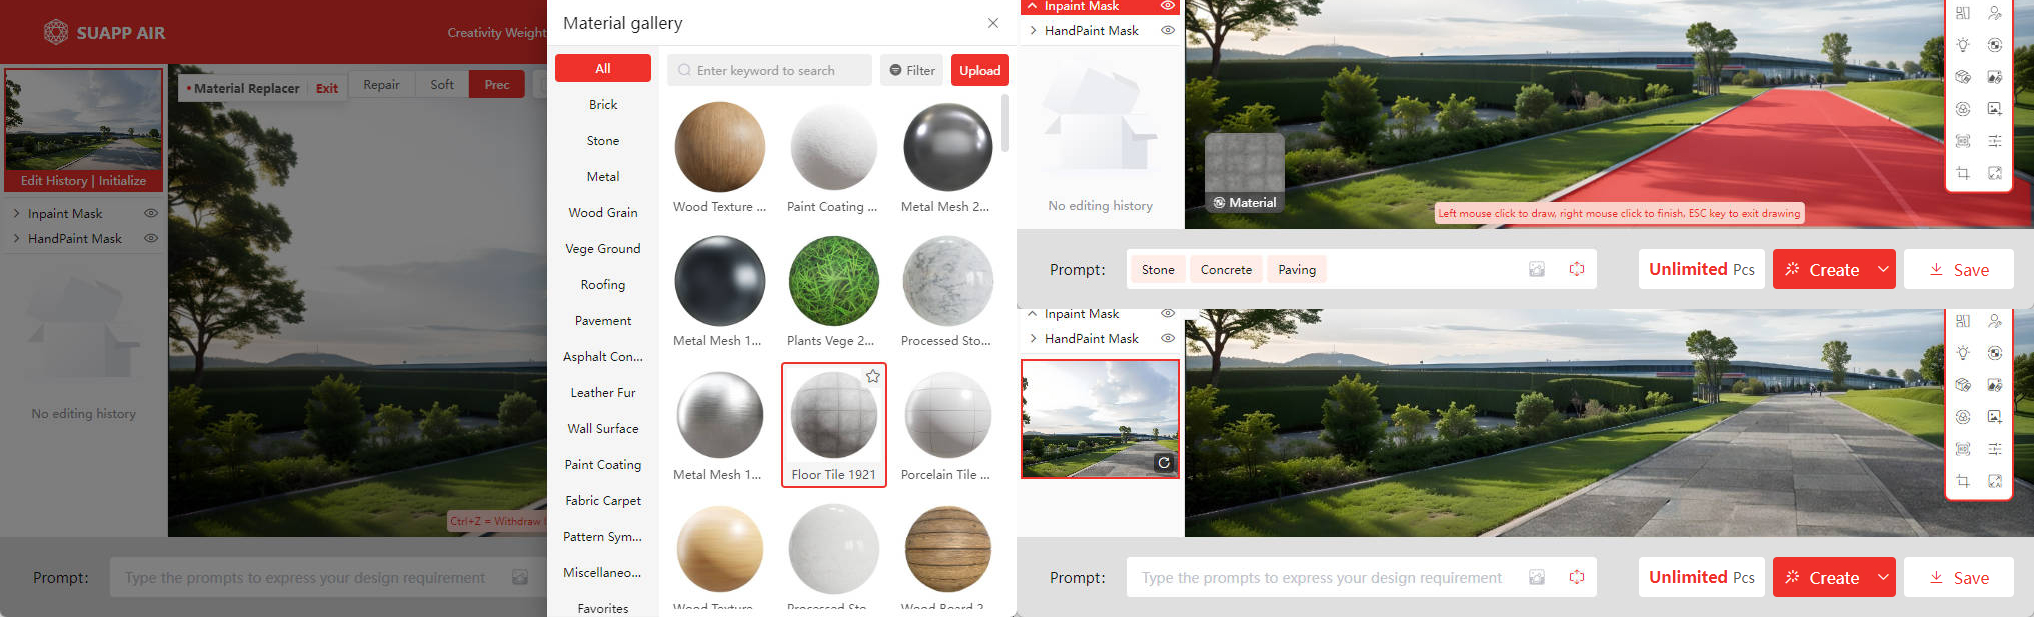
Material Replacer
Upload a material texture or choose one from the built-in library, then apply it by selecting a mask area for replacement.
Demo Video: SUAPP AIR | 20 Assign Material
- /31
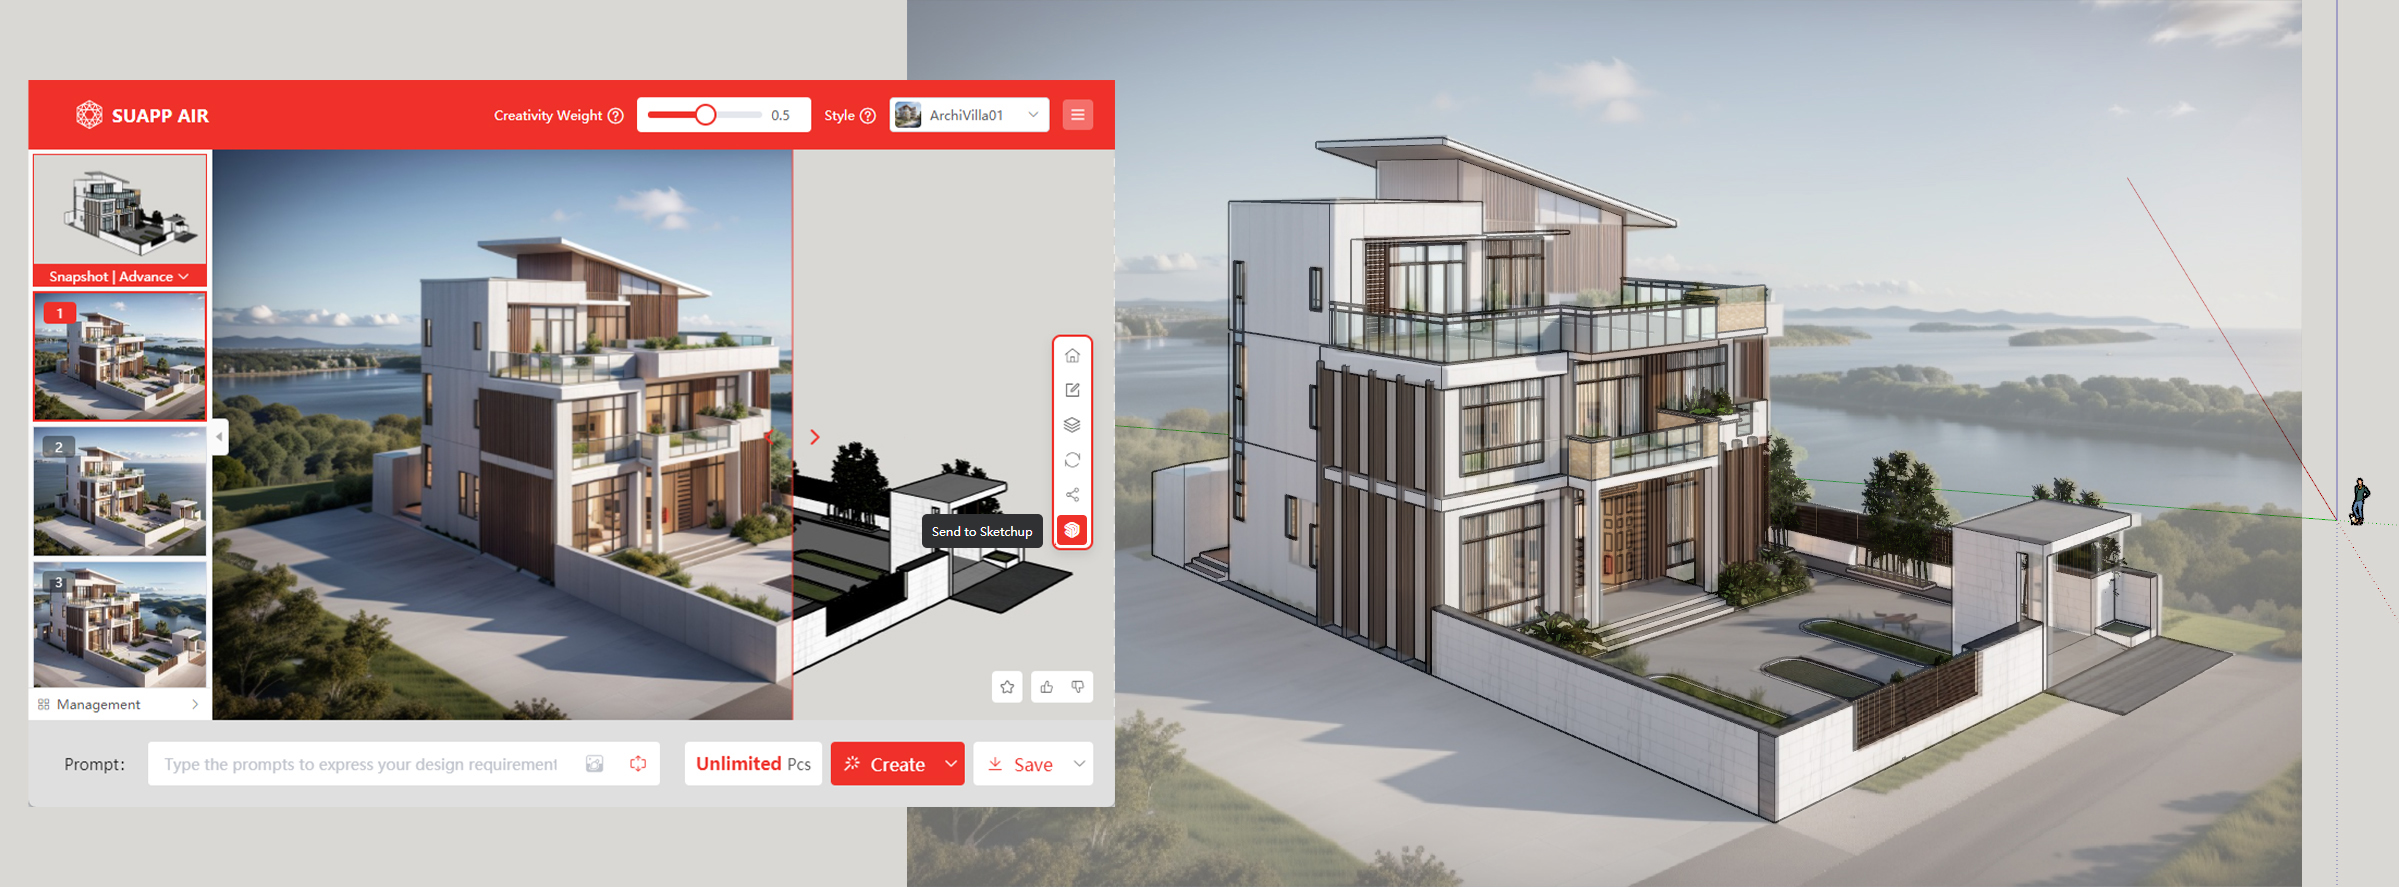
Send to SketchUp
Automatically match photos to the current model and use the rendered results to reverse-engineer design ideas, assisting in model creation.
Note: This feature is only available after rendering using a model screenshot.
Demo Video: SUAPP AIR | 17 Send to SketchUp
- /26
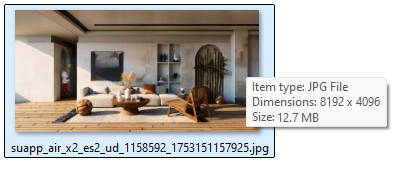
What is the maximum resolution SUAPP AIR can save?
SUAPP AIR supports Ultra-HD export. With 2× upscaling, images can reach 4× the original resolution. It's not just pixel enlargement—AI enhances and restores details during the process. Most exports reach 4K–8K, or even higher depending on the aspect ratio, meeting early-stage design presentation needs.

 Plugin version
 SUAPP AIR for SketchUp
 SUAPP AIR for Rhino
 SUAPP AIR for Revit
 SUAPP AIR for 3ds Max
 SUAPP AIR for Blender
 SUAPP AIR for Photoshop
 SUAPP AIR for AutoCAD
 SUAPP AIR for Windows
 SUAPP AIR for macOS


